
How to Create a Workspace in Microsoft Fabric?
In this guide, I’ll show you how to create a workspace in Microsoft Fabric, step by step. Whether you’re working with Power BI reports, data lakes, or performing complex data transformations, a workspace is the foundation for all your activities in Microsoft Fabric.
If you’re getting started with Microsoft Fabric, one of the first tasks you’ll need to do is set up a workspace. A workspace in Microsoft Fabric serves as the central hub for managing your data, analytics, and business intelligence tasks. It provides a structured environment where you can bring together data from various sources, transform it, and analyze it using the tools that Microsoft Fabric offers.
NOTE: If you don’t know what is Microsoft Fabric, make sure you read one of my previous blog posts. While this blog post is focused on Microsoft Fabric on top of D365F&O, I think it will give you some ideas on how does Microsoft Fabric work and how it can help you analyze your data.
What is a Workspace in Microsoft Fabric?
A workspace in Microsoft Fabric is a collaborative, secure environment that organizes the resources you need for your data processing and analytics workflows. It allows you to manage datasets, pipelines, notebooks, and other elements of your data solutions. By creating a workspace, you can work on multiple projects within a structured setting, and easily manage access controls, security, and permissions to ensure the right people have the right access.
Workspaces are an essential component of Microsoft Fabric, enabling data engineers, analysts, and business users to interact with data effectively in one central location.
Step-by-Step Guide: How to Create a Workspace in Microsoft Fabric
Now that you understand what a workspace is, let’s dive into the process of creating one. Follow these steps to get started:
Access Microsoft Fabric
First, ensure that you have the necessary permissions to create a workspace in Microsoft Fabric. If you don’t already have access, reach out to your administrator for assistance. Once you have access, log in to your Microsoft Fabric environment by going to https://app.powerbi.com/.
Create a New Workspace
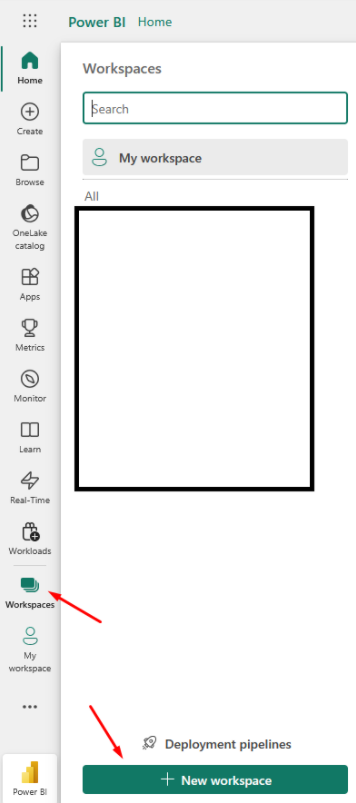
In the Admin Portal, locate the option to create a new workspace. This is usually found under the “Workspaces” section. Click on the Create Workspace button to begin the process.
Name Your Workspace
You’ll be prompted to provide a name for your new workspace. Choose a name that clearly reflects the purpose or project the workspace will support. For example, if your workspace will be used for sales data analysis, consider naming it something like “Sales Analytics.” You can also enter a description for your workspace and choose the workspace image:
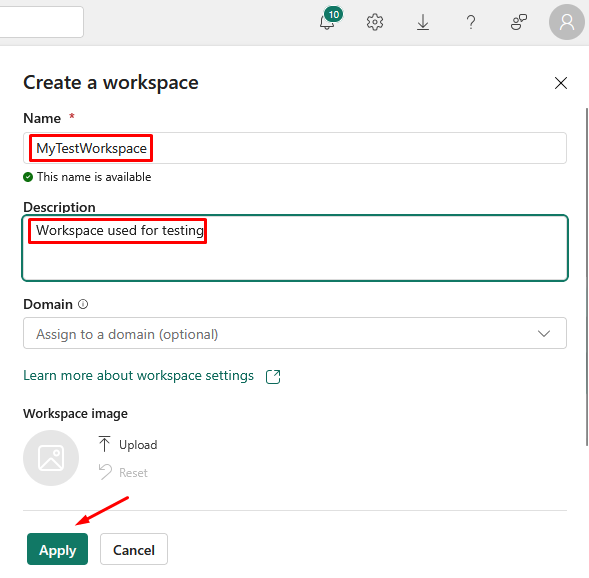
When you are done, make sure you click Apply.
Set Up Permissions
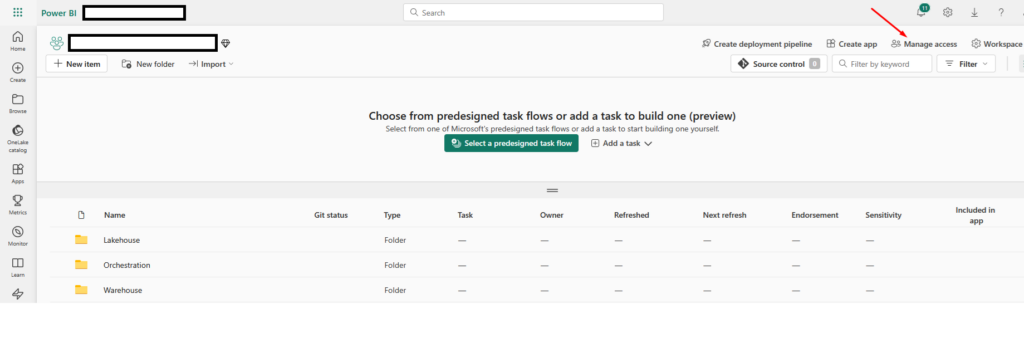
The next step is to define the permissions for your workspace. Determine who in your organization will have access to the workspace and what level of access they should have. You can assign roles such as Admin, Member, or Viewer depending on the user’s responsibilities. When in workspace, just click on Manage access:
Click on Add people or groups to add additional users:

Microsoft Fabric License
Make sure you select a proper license for you workspace. Click on Workspace settings first:

Go to License info to check which license is assigned to this workspace. Click on Edit if you need to change it.
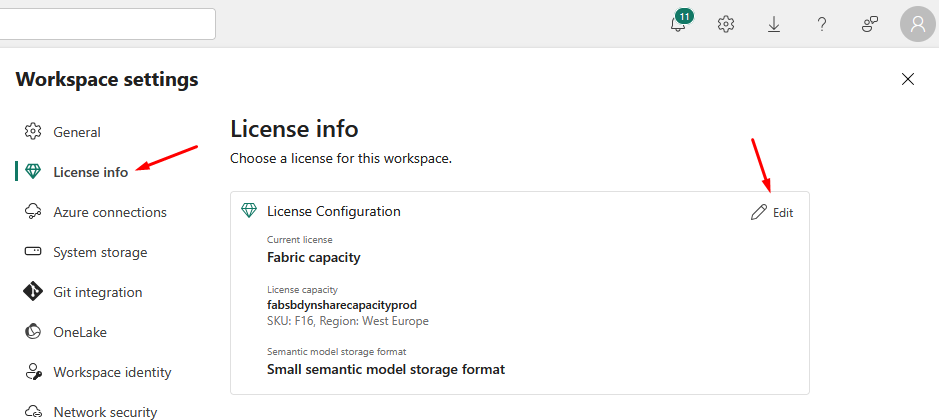
NOTE: I had some Fabric trial linked to my account, so all my workspace were created under trial license.
Why Workspaces are Crucial in Microsoft Fabric
Workspaces in Microsoft Fabric provide a streamlined way to organize and manage your data processes. Without a workspace, it would be difficult to keep track of data sources, reports, and transformation logic. They also allow for better collaboration among team members, as everyone involved in a project can access the same environment, with the appropriate permissions.
Furthermore, workspaces support a wide range of tools and integrations, such as Power BI for reporting, notebooks for data transformations, and the ability to connect to various data lakes and warehouses, making them indispensable for anyone working with data in Microsoft Fabric.
Conclusion
Knowing how to create a workspace in Microsoft Fabric is an essential skill for anyone working with data in this platform. By following the steps outlined above, you’ll be able to set up your workspace quickly and start leveraging all the powerful tools Microsoft Fabric has to offer.
Remember, a workspace is just the beginning. Once created, you can populate it with data, create reports, transform datasets, and collaborate with others—all from one centralized location.
Now that you know how to create a workspace in Microsoft Fabric, you’re ready to start building powerful data solutions!
How To Add FinancialDimensionValue table from D365FO to Fabric
Azure Synapse Link: Failed to fetch TypeError
Microsoft Fabric and D365 F&O: 13 Things to Know
About The Author
Mika
Hi, I’m Mika. For the past 17+ years I've been working as a consultant, solution architect, and project manager for business applications. Now, I’m exploring data analysis, business analysis, and AI. Follow my blog for insights on enterprise systems, data analytics, and productivity tips.