Microsoft SQL Server Installation Guide: Step-By-Step Guide to Installing SQL Server on Windows.
Introduction
Welcome to the second part of my SQL tutorial series! Last time I talked about what is SQL and what is it used for. In the following Microsoft SQL Server Installation Guide, I will walk you through the process of installing Microsoft SQL Server Express, a tool that will allow you to store the database you will later use for writing SQL queries. Whether you’re setting up your first database or just need a refresher, this Microsoft SQL Server installation guide will show you an easy and quick way to get everything ready for the next part of my SQL tutorial. By the end of this second part, you should have a functional SQL Server installation on your PC, ready for your first database project.
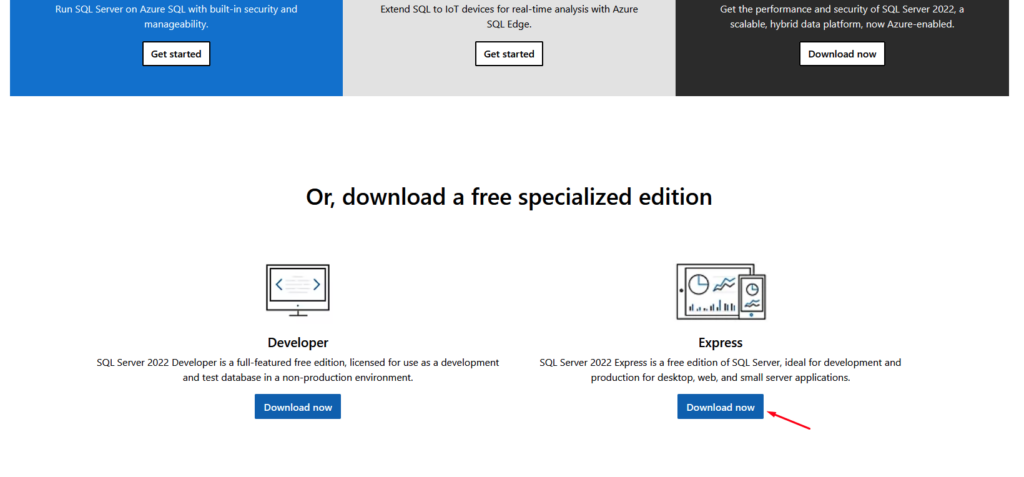
The first thing you have to do is to download Microsoft SQL Server Express here, or simply use Google and search for “Microsoft SQL Server”. You should download the Express edition. Microsoft SQL Server Express is a free edition of Microsoft SQL designed for simple lightweight applications and learning.
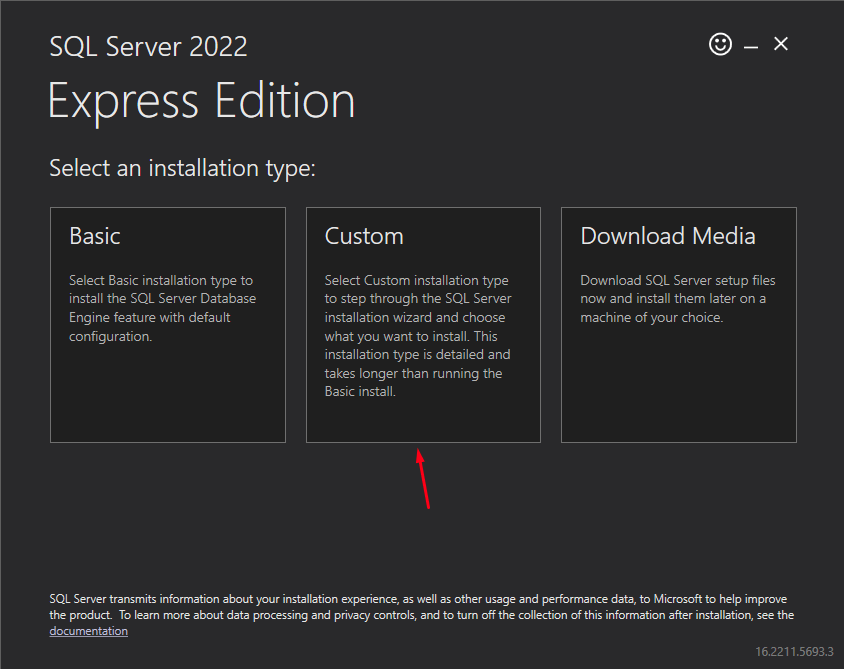
Run the setup file and choose the Custom installation:
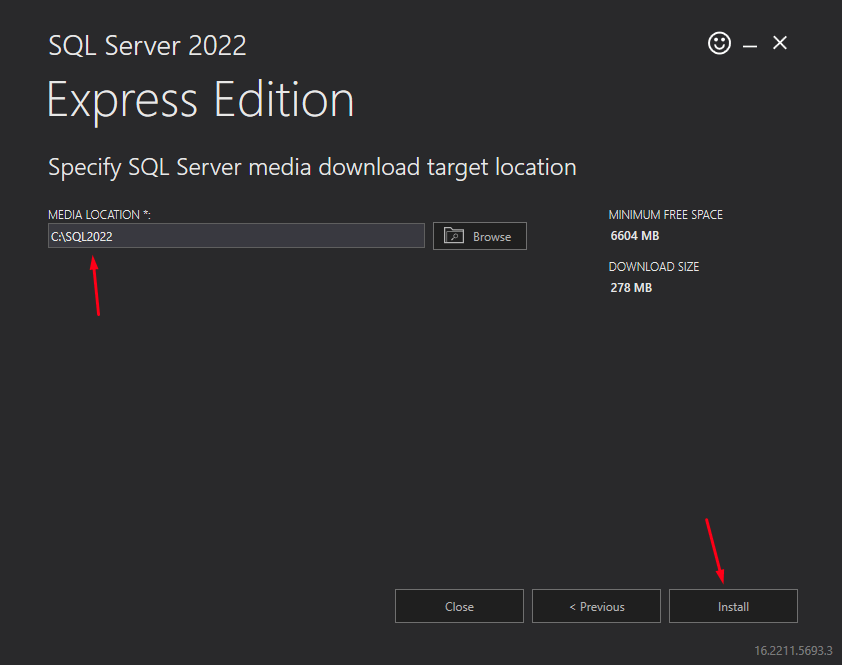
I usually leave the setup on the following screen as it is, but if you want you can change the location where the system will download the necessary installation files. After you are done, click on the Install button:
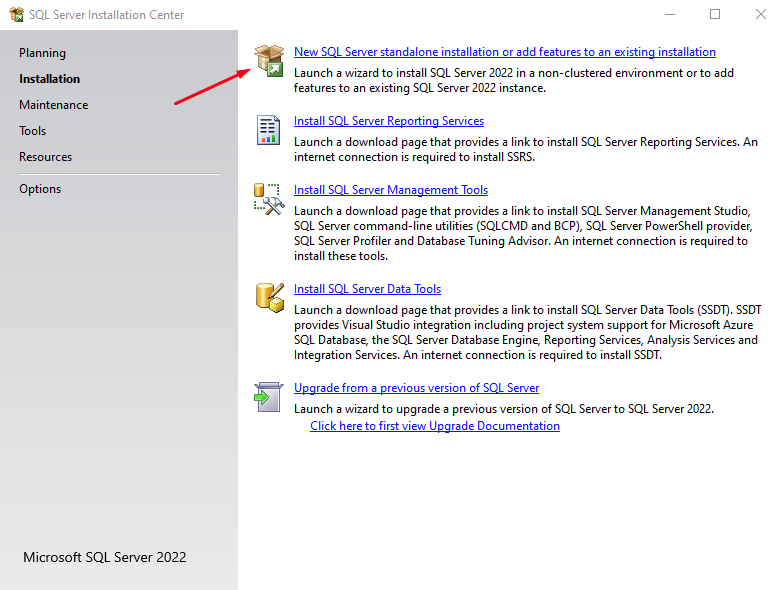
In the next step, we will choose to install the New SQL Server standalone installation, since we are installing the SQL Server from scratch:
Accept Microsoft’s license terms and click on Next:

Now the Microsoft SQL Server Installation will install the required setup files. After all the steps have been completed, click on Next:

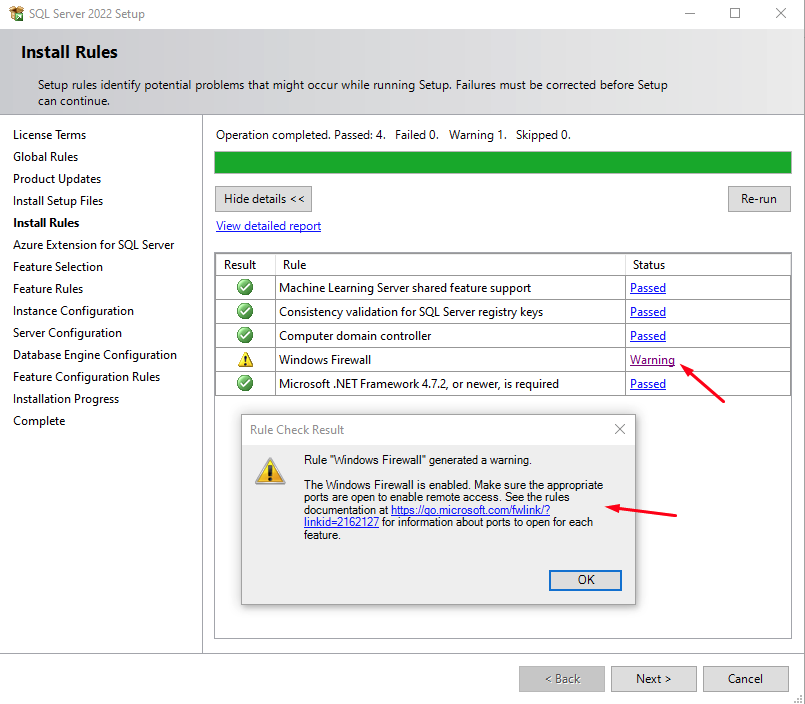
In the next step, the installation will check for potential problems that could appear during the setup:
Ignore the Windows Firewall warning and click on Next:
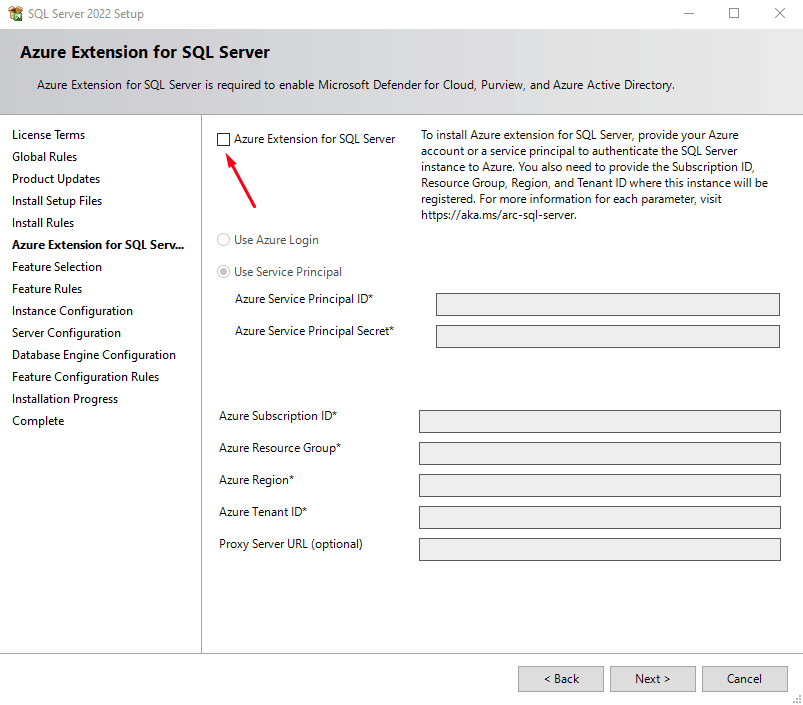
In the following step, you can turn off the option Azure Extension for SQL Server. This option connects the SQL Server on your local machine with Azure Service. For example, if you use this option, you can easily back up your databases to Azure. Remove the checkmark and click Next:
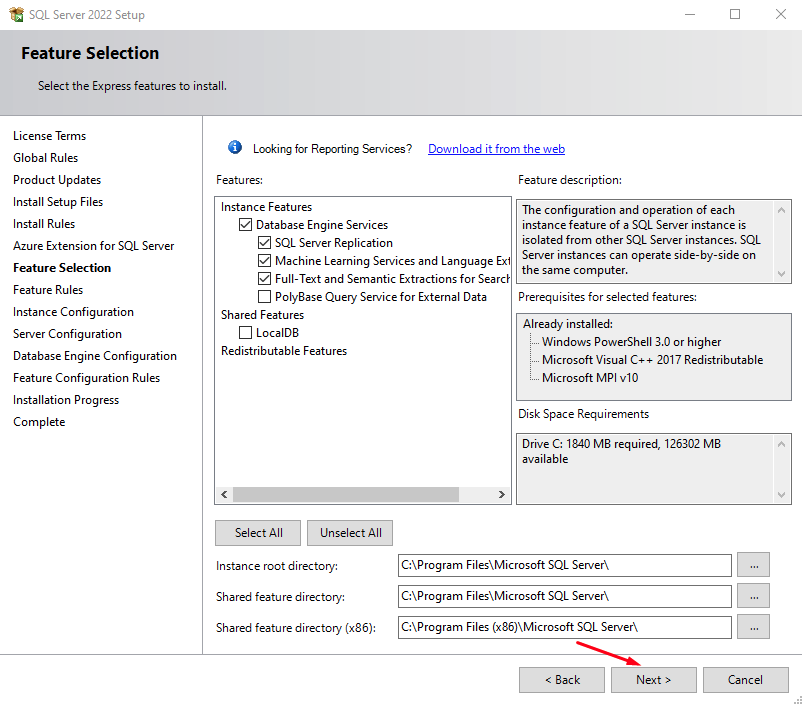
The installation will ask for features that you want to install. Feel free to leave the default values, and click Next:
If you want, you can change the name of your SQL Server instance, but I recommend that you leave it as it is and just click on Next:
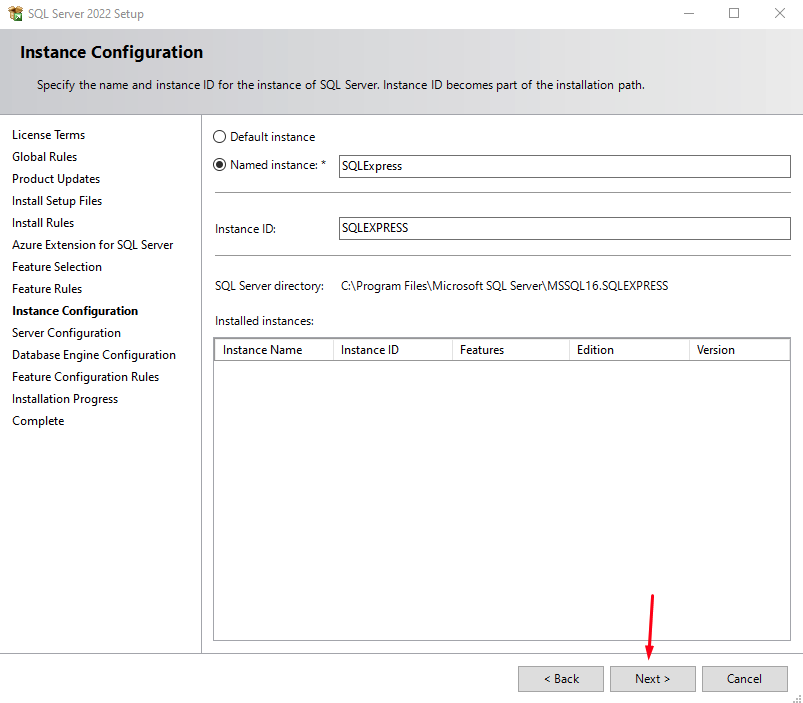
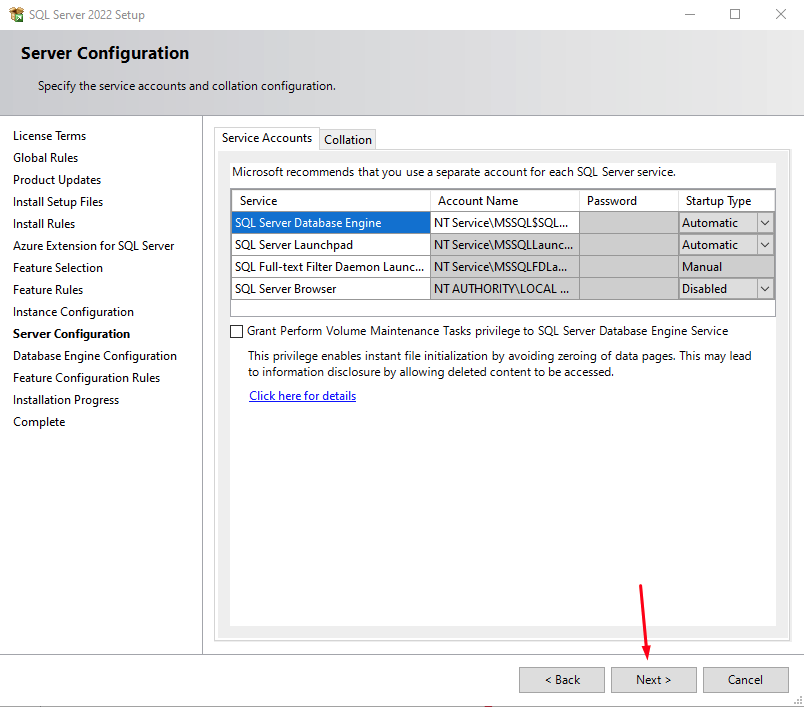
You can skip the following configuration part and just leave the default values:
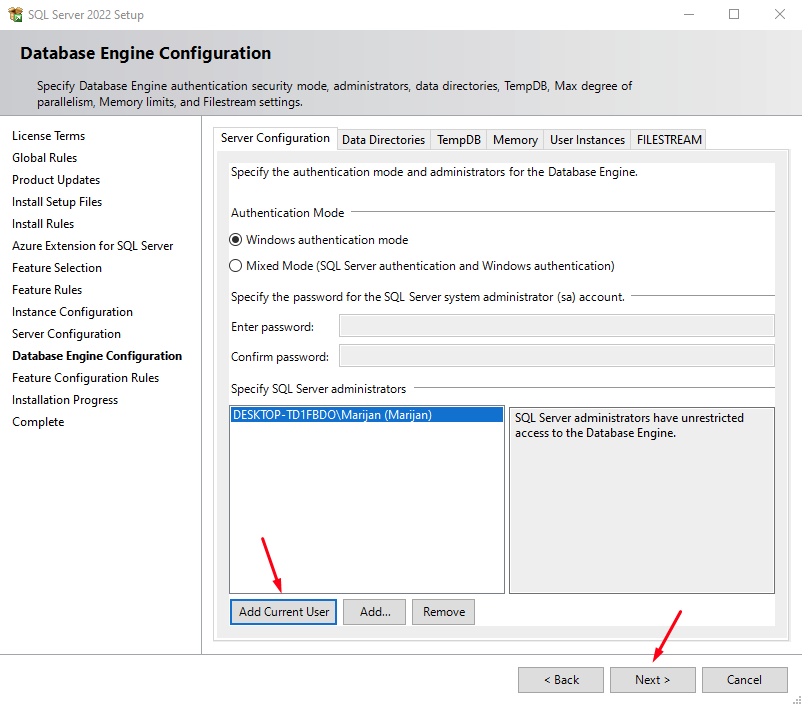
In this step, the installation will ask you how you would like to authenticate the logins to your SQL server instance. Since you will be the only one using it, you can leave the Windows authentication mode. If there are no users in the Specify SQL Server administrators section, simply click on Add Current User, and proceed to the following screen.
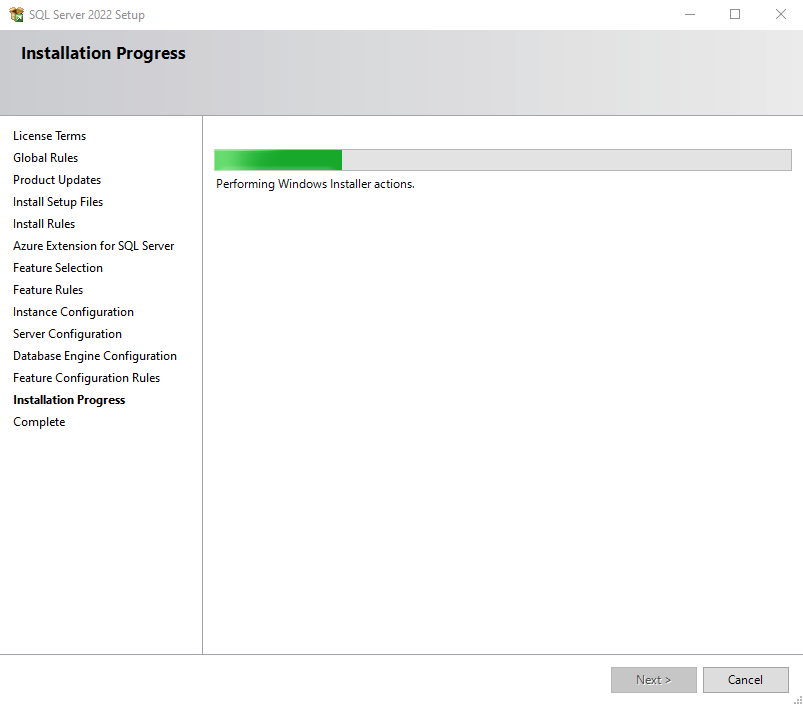
The installation will finally start:
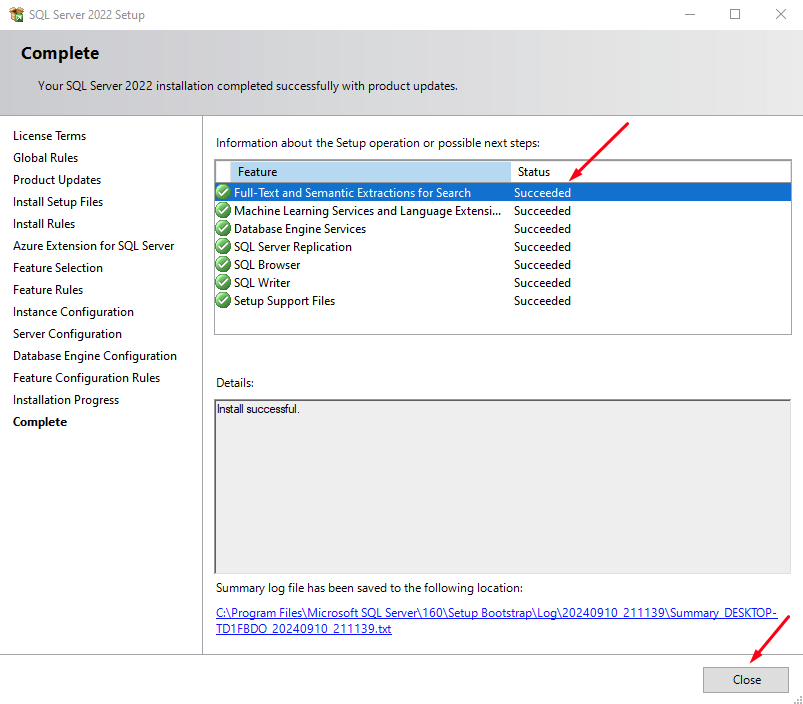
After a few minutes, if everything is OK, you will see a screen similar to this one:
Installing SQL Server Management Studio
We finished with our Microsoft SQL Server Installation Guide, but we need a tool to manage your databases and users and to write SQL queries and views. SQL Server Management Studio (or SSMS) is Microsoft’s official tool that provides a simple interface for executing queries, managing database objects, and monitoring SQL server performance.
While SQL Server Installation Center is still running, click on Install SQL Server Management Tools:
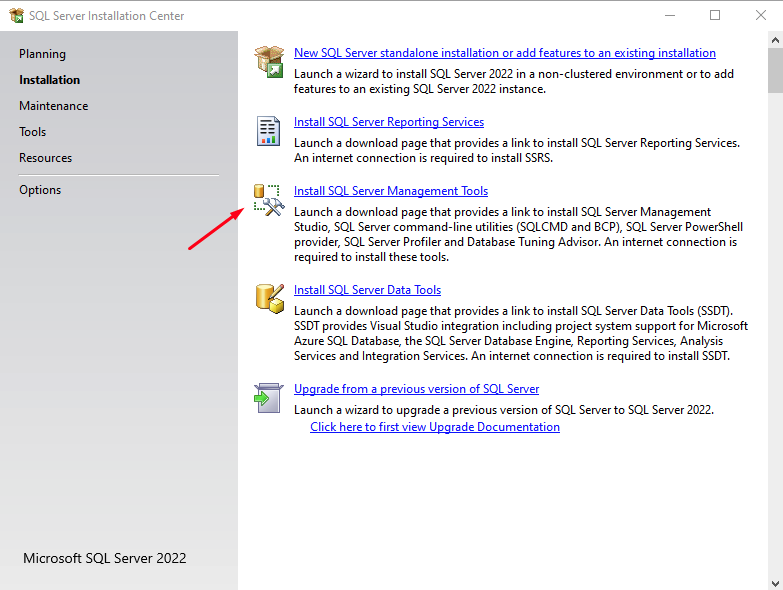
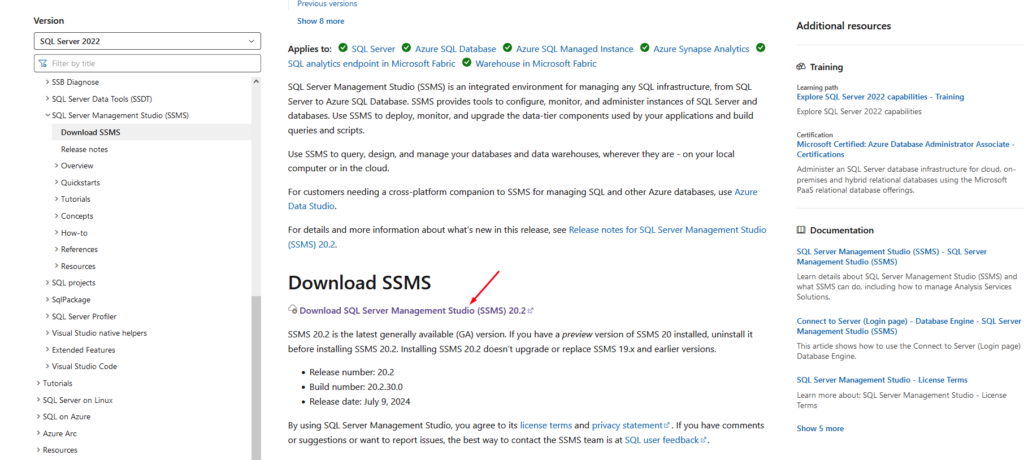
It will take you to the following page: https://learn.microsoft.com/en-us/sql/ssms/download-sql-server-management-studio-ssms?view=sql-server-ver16
Click on Download SQL Server Management Studio (SSMS):
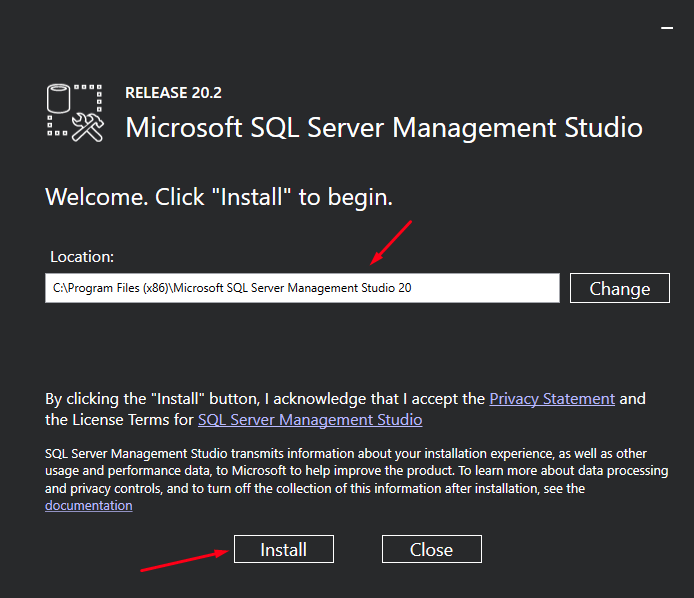
Run the installation first and change the location of the installation if you want. I prefer to keep it as it is. Click on Install:
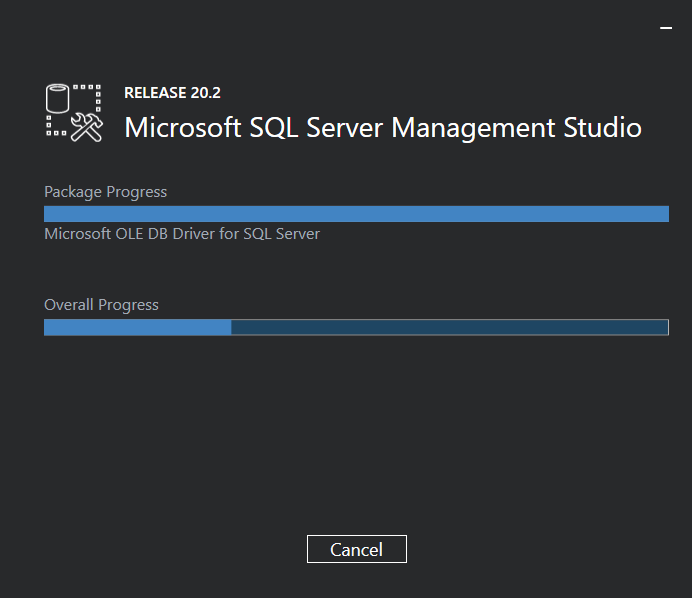
The installation will start immediately:
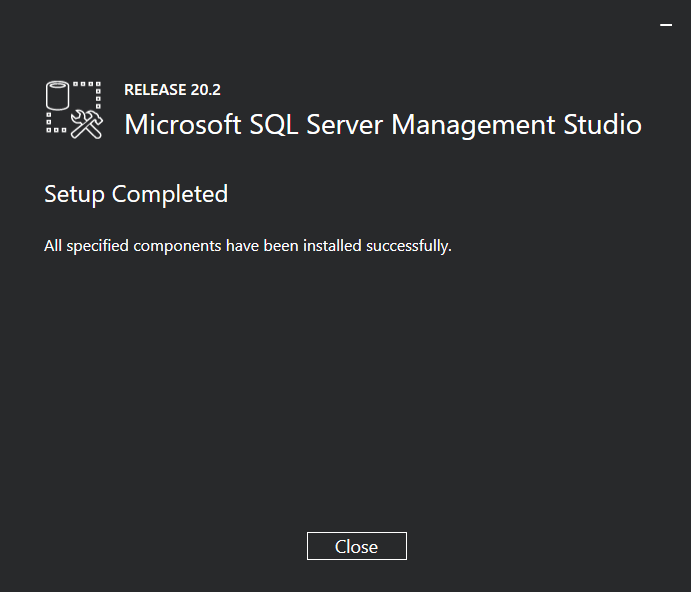
After some time, you will get the message that the setup is completed. Just click on Close:
Installing the Northwind Database
In order to write your first queries, you need some data. That’s why we will use the Northwind database – it’s a sample database that was originally created by Microsoft.
Go to the following link to download the necessary files: https://github.com/Microsoft/sql-server-samples/tree/master/samples/databases/northwind-pubs, and after that, run the SSMS.
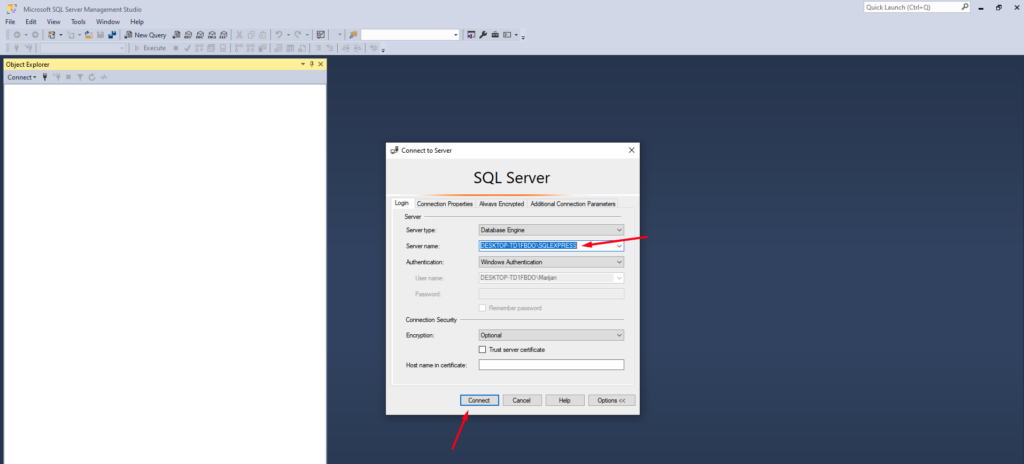
The server name of your SQL instance should be already selected, so just click on Connect:
Open the instnwnd.sql file in SSMS and add the following code like this:
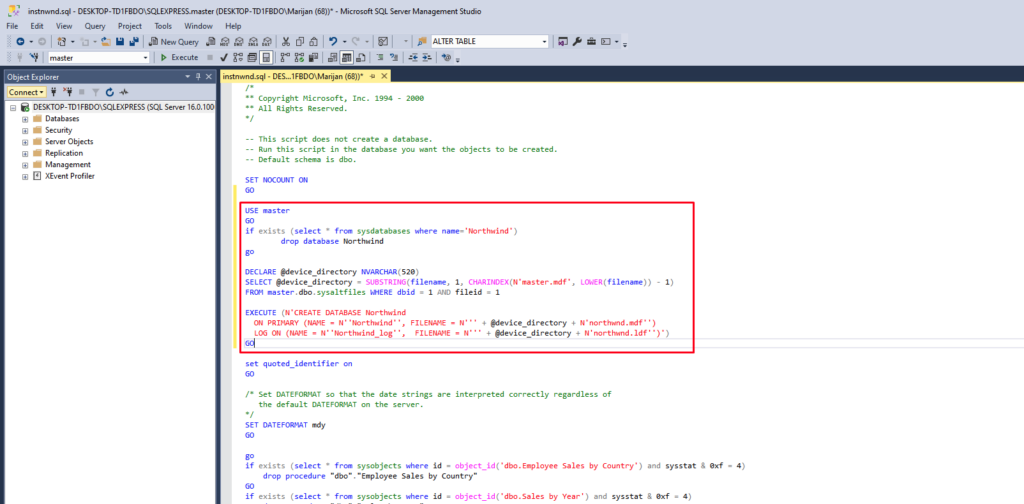
Here is the code:
USE master
GO
if exists (select * from sysdatabases where name='Northwind')
		drop database Northwind
go

DECLARE @device_directory NVARCHAR(520)
SELECT @device_directory = SUBSTRING(filename, 1, CHARINDEX(N'master.mdf', LOWER(filename)) - 1)
FROM master.dbo.sysaltfiles WHERE dbid = 1 AND fileid = 1

EXECUTE (N'CREATE DATABASE Northwind
  ON PRIMARY (NAME = N''Northwind'', FILENAME = N''' + @device_directory + N'northwnd.mdf'')
  LOG ON (NAME = N''Northwind_log'',  FILENAME = N''' + @device_directory + N'northwnd.ldf'')')
GO
Add another line of code here:
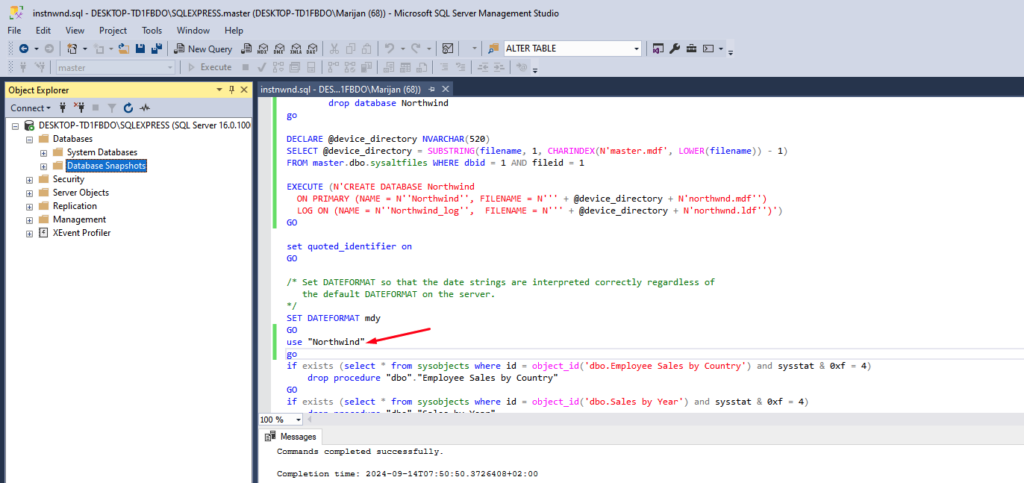
Here is the code, so you can copy-paste it:
use "Northwind"
NOTE: All this code that you see is actually a query that creates the sample database and tables inside that database. It also inserts data into tables. We will learn SQL by querying this data.
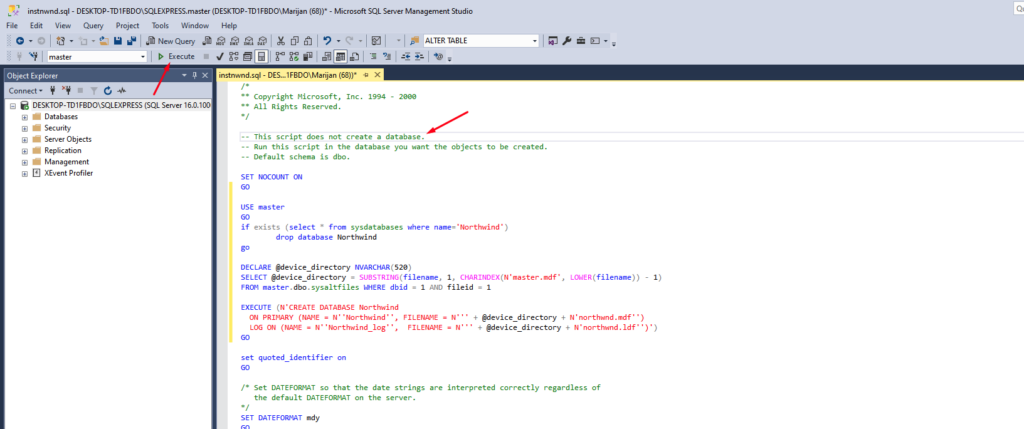
Execute the code by clicking on Execute (or pressing F5 on your keyboard) and ignore the text that says the script does not create a database. That’s exactly why we added the code in the previous step:
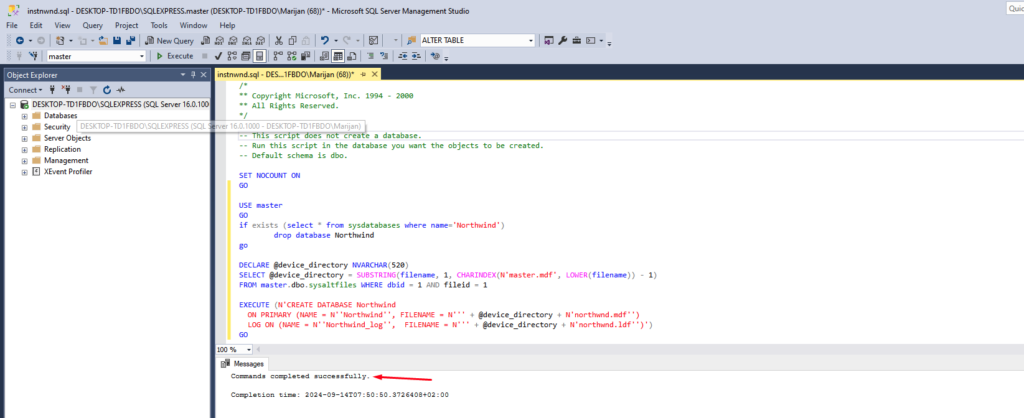
After a few seconds, you will get the following message:
You will see that the database has been created, together with the tables that we will use in this tutorial series:
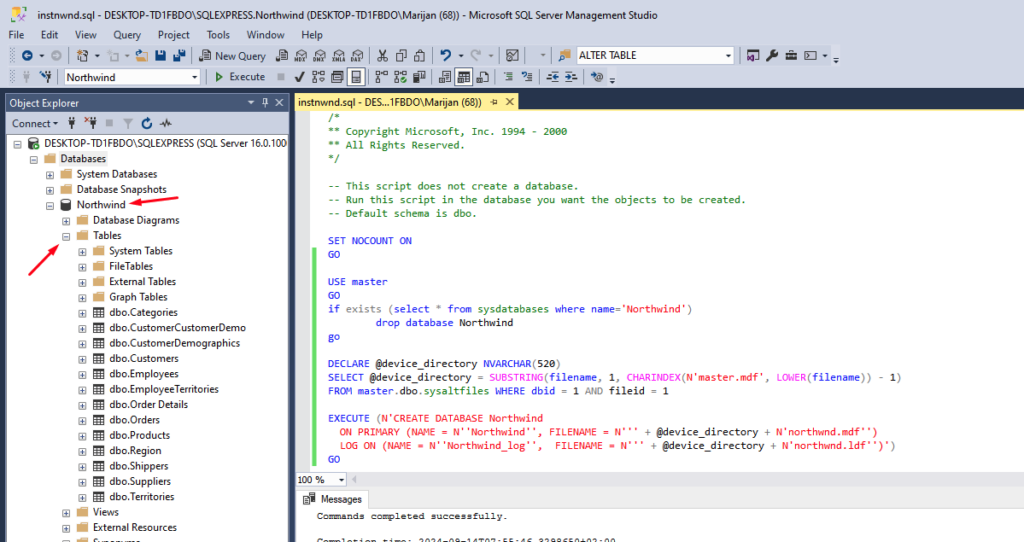
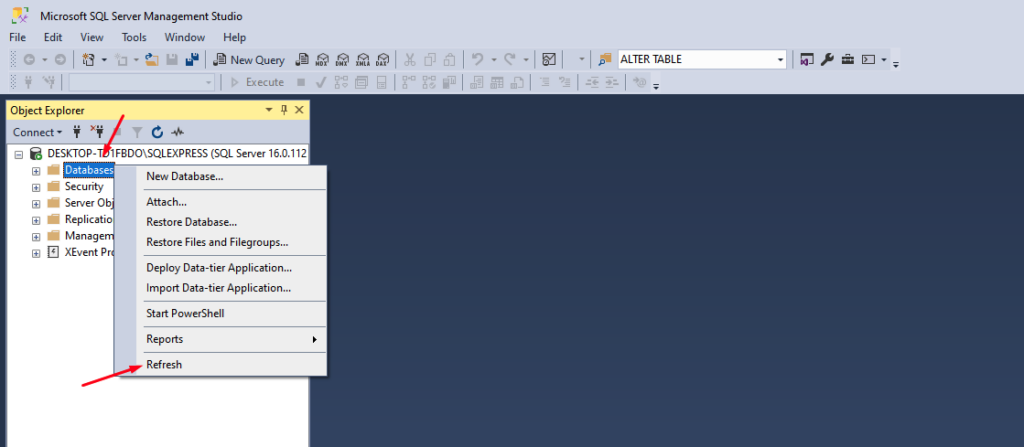
If you don’t see the database, right-click on Databases and click on Refresh:
If you have successfully installed SQL Server, SSMS, and the Northwind database, you’re now prepared to write your first SQL queries. If you found this Microsoft SQL Server installation guide helpful, feel free to share it and leave any questions in the comments below.

